This is the final artwork of the Winter Landscape that I’ve made using
the wet-on-wet technique which you will be learning in this blog step by step.
First
of all, let’s discuss more on the wet-on-wet technique that I have used
extensively for this artwork. This technique will help us in achieving a more
natural and softer look and it is less time-consuming.
Wet-on-Wet
technique is a process
of applying layers of wet paint before the older layer of wet paint dries on
the surface/paper which is already wet. We wet our surface using clean water
before we start painting to give more natural flow and to create effects. It
helps in blending colours softly with less harsh strokes and blurring out details
to give a more natural yet abstract scene to the painting. One can also use the
wet-on-wet technique along with the wet-on-drytechnique (The process of applying wet paint
on the dry surface or the dried paint). But we’ll stick to using the wet-on-wet
technique for this.
Materials that I have used for this artwork
(however, you can start with whatever you have right now):
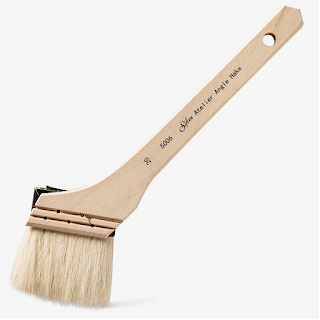
o A BrustroArtists’ Natural Hair MOP brush, a Princeton
Neptune Series flat
brush, and a Brustro miniature brush.
o You can use watercolours, acrylic, gouache
or oil paints but I’ve used watercolours of pigments Blue (Cobalt blue/ Prussian
blue), Orange, Red, Black, Dark Green, and Winsor
& Newton Designers white Gouache (if available or you can use white
acrylic paint as an alternative).
o Also, Winsor & Newton Masking Fluid Masking Fluid is used as a protective film
to separate the paints getting mixed.
o Brustro Watercolour Paper of 300 GSM or above.
Quick Tips:
·
Premix the shades that will be needed.
·
Tape down the sides of your canvas on a piece of cardboard or a pad
to paint with more comfort.
·
Always keep clean water in small jars.
·
Use a watercolor paper that has more absorbency (300 GSM or above).
·
Also, never forget tissues to clean your brushes before you move on
to the next shade.
Now grab a paper and brush and let's get it
started!
1.
First we start with sketching the rough figure of cabins and pine trees and
mark out the details for the doors and windows of the cabins and the cabin
fence. Take reference from the below image.

2.
Next, we will apply desired Winsor & Newton Art Masking Fluid only to the cabins and trees. This will
help us to separate the area for painting the sky later. And the paints will
not mess with our cabins and trees. (This step is very important it’ll help to
ensure that our colours are not messing with each other)
3.
Then we will apply some clean water uniformly on the top side of the paper
where we are going to paint the sky using any Princeton
Neptune Series flat
brush. Make sure that you apply a thin layer of water, if you see puddles that
means you've applied too much of the water needed. The next layer would be
using the Blue paint but we need to make sure that we use more water than the
paint to maintain the transparency.
Next,
we will start with swiping and dabbing the blue shade (while it is still wet)
moderately in curves with any round brush as you can see in the image below.
As we
move forward, we will add more blue shade and less water to give a little more
opaqueness to our sky.
4.
Next we add the shades of orange and red in the same process of swiping and
dabbing our brush in curve stokes as we did in step 3 and then blend and try to
merge it little by little with the Blue above so it gives an impression of a
setting sun before our base dries out.
We can
use the Bloom effect here, and to get this, we first spread a thin layer of the
paint water (again make sure that you use more water and less paint) so that
our pigment can spread blurring into the wet area, drop a splotch of paint in
the wet area and we let it spread into its own, this method gives the bloom
effect as it merges with colours on its own. As astonishing as it sounds it is
more fun to watch in itself.
Make
sure that you have built the depths of the colours slowly as you go with layers
and layers, first with more water and then with more paint.
5.
Now we take Winsor & Newton
Designers white Gouache
and blend it with
a little bit of grey shade and brush right through the paper below where the
cabin fence ends and a few strokes on the lower side of our paper to form the
sheet of snow as shown. Blend the harsh edges with a clean brush to give it a
softer texture.
6.
Remove the masking fluid we had applied earlier to the cabins and pine trees
(use a piece of clothing to slowly scrape off the fluid). And start by applying
black shade to the cabins with a miniature brush, this time we will go from
dark to light so our brush should have more paint and less water. Then move on
to painting the pine trees, we will add pine trees near the cabins. Use dark
green shade in a zig-zag motion again with a miniature brush to paint pine
trees. Build on the colour slowly adding the details to it.
7. In
this painting, we are depicting the scene after a snowfall so we’ll have to add
the details of fallen snow using white gouache or white acrylic paint to the
cabin rooftops and pine trees. Make fences around the cabin using black colour
and add some white strokes to highlight the windows and doors of the cabins.
Paint heaps of snow around the cabins and cabin fences by mixing a dark shade
with the white gouache while emphasizing the details to get the final result.
Finally,
mesmerize the art you’ve created!
I hope
you guys enjoy the process of painting this beautiful Winter Landscape as I had
enjoyed it when I first created it.


Comments
Post a Comment